

Here's my most ambitious pinhole project yet - a 6x6 camera for 120 roll film with a bellows that can be pulled in to 50mm and extended to 90mm. The camera also has two pinholes - a 0.27 mm for the 50mm setting (equals f185) and a 0.36 mm pinhole for 90mm (equals f250).
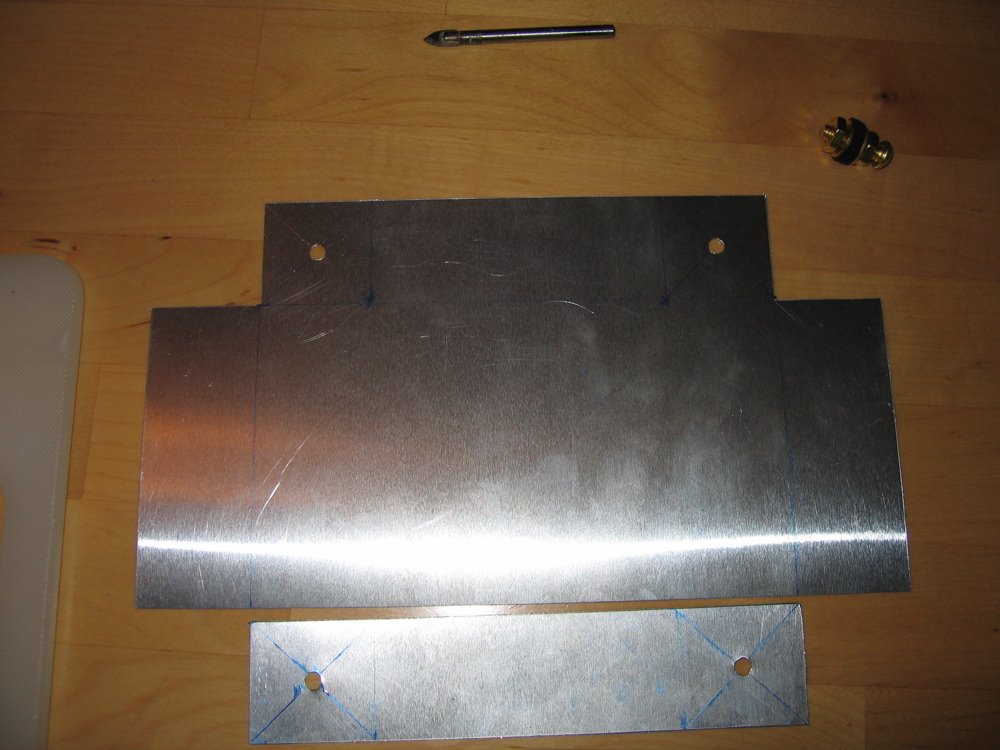 The body cut to size and ready for bending into a three-sided box, plus top plate.
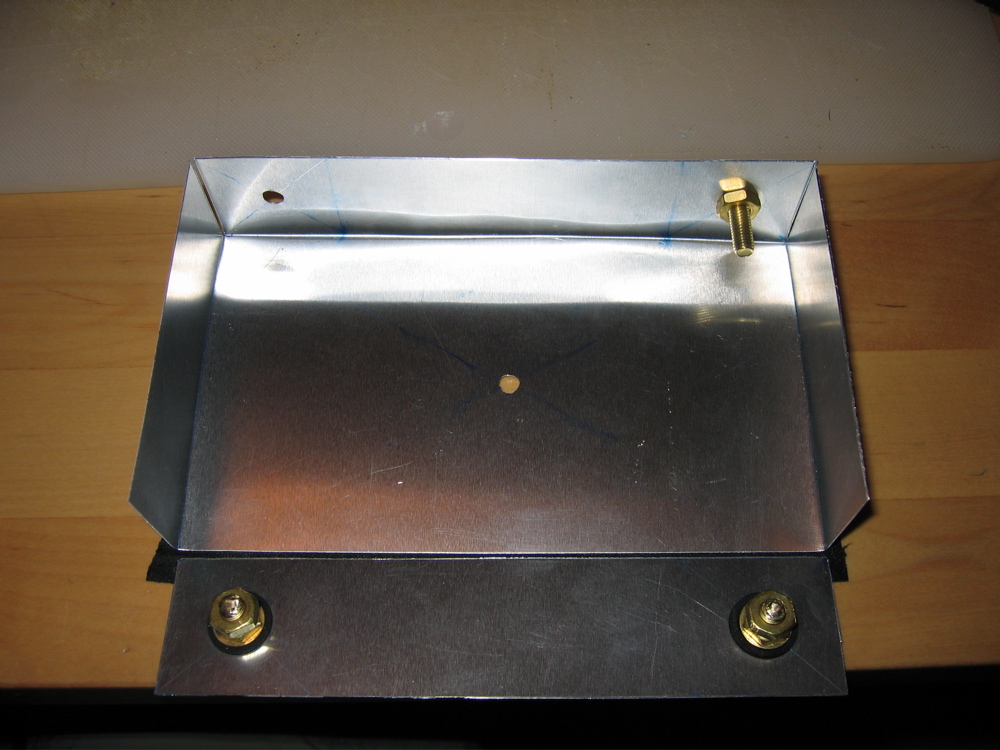 The body bent into shape with the top plate attached. This plate will swing up to allow the film spools to be loaded into the camera.
 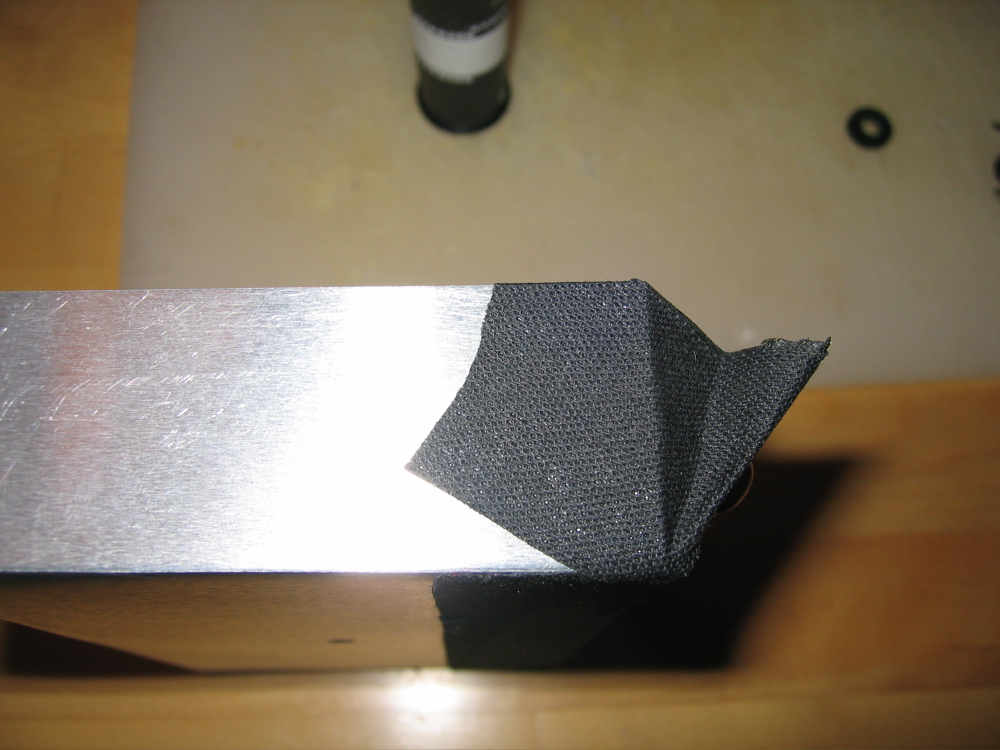 Here's the lightproofing for the top plate. The tape (it's taped from both sides) folds inside the camera to provide a flexible light seal.
 I originally thought I would make the swing-out plate the bottom plate (as in this photo), but I later changed it to the top plate.
 Detail of the winder - it's a 8-32 nylon bolt from Home depot that I shaved down with an Olfa cutter to fit snugly inside the film take up spool. There is a lock washer between the brass nuts to keep them tensioned on each other. I later put a brass washer between the top plate and the first nut to reduce friction. There is a washer and nut on the other side, topped by the knurled knob. The knob and the nut are tensioned together, leaving the tension on the plate sufficient to hold the spool in place (to prevent unwinding) but still turn freely.
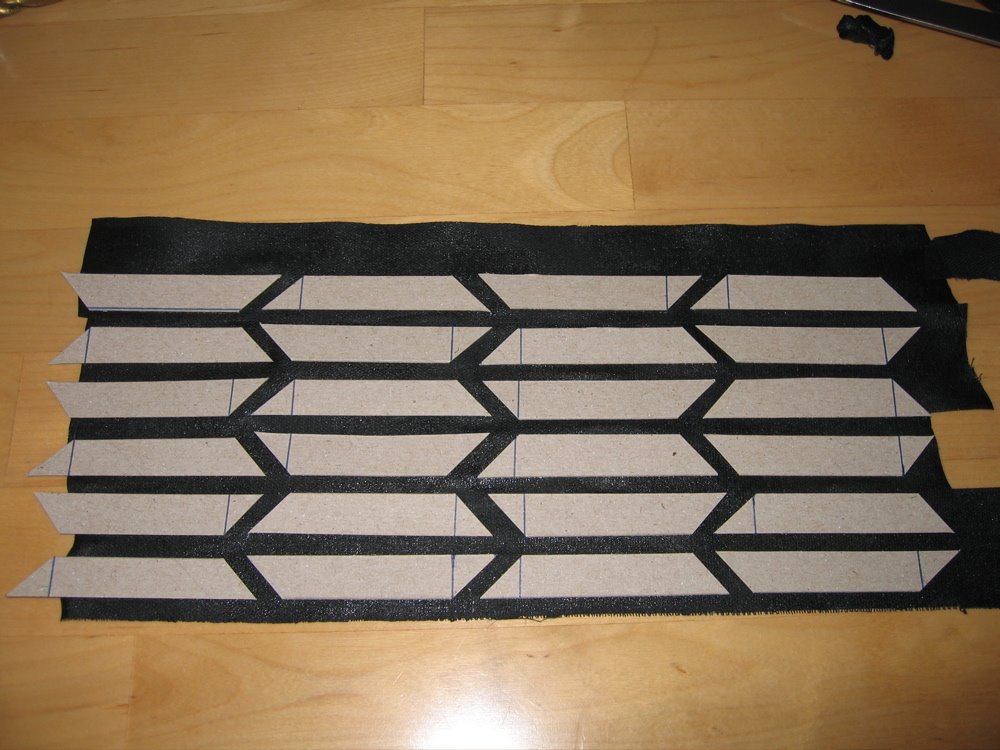 Making the bellows is actually quite easy - lay out strips of hockey tape on a clean surface (sticky side up) and temporarily tape their edges down to keep them flat. Lay out your stiffeners as per the photo, and then tape over them with another layer of tape. The only trick is getting the edges lined up right when you fold it into a (square) tube - you want the spacing to be the same as for the other joints.
  The finished bellows ready for mounting into the camera.
 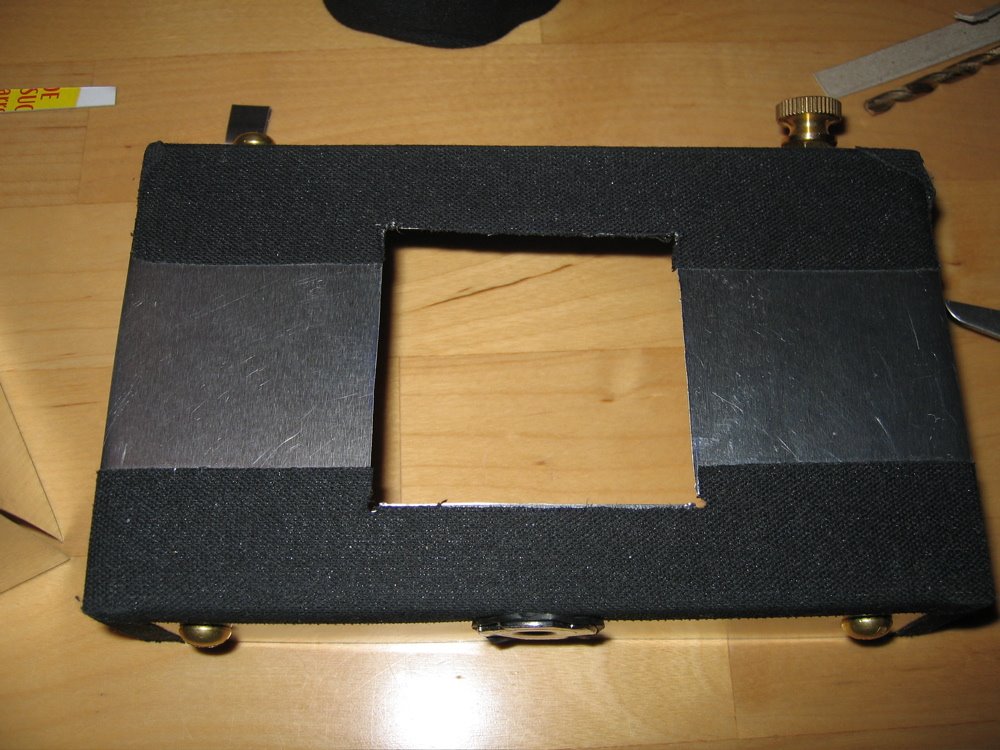 The camera body cut out for the bellows.
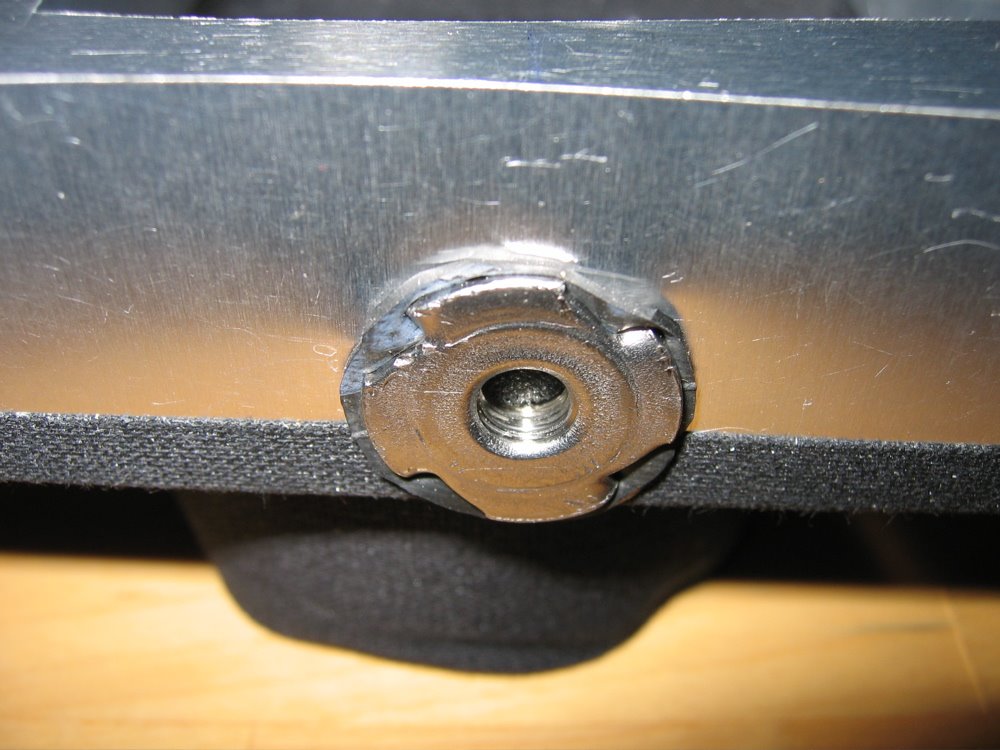 Detail of the tripod mount - a 1/4 x 20 T-nut designed for wood construction. It has four sharp "teeth" around it that I used to pierce the aluminum and then crimp over to hold it firmly in place. I first pressed it into the drilled hole to mark the bottom plate with the teeth, then started the holes for the teeth with the tip of the Olfa knife, and then pushed them through. There is also a gasket of bicycle innertube rubber between the nut and the bottom plate to keep everything light-tight.
 The tripod mount from the inside. I light-proofed the nut by putting a small piece of foam into the bore and crimping in a small circle of aluminum sheeting (cut with a hole punch).
 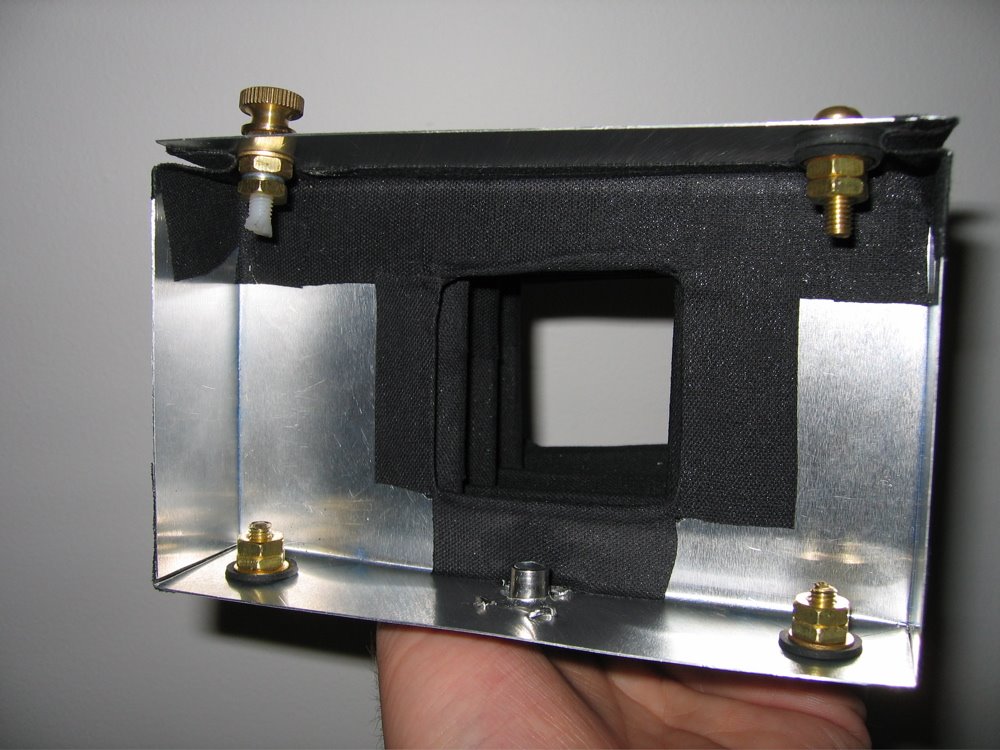 Here's the whole camera at this stage - bellows taped in, tripod mount installed. You can see the winding bolt is now in the flexible top plate. The non-winding spool bolts are lightproofed with rubber washers. It took some care to get the nuts into exactly the right spot so that everything is precisely aligned for film transport. The compressibility of the rubber washers helped this process.
 Here's the camera with the film mask installed and an old roll of film I used for spacing. You can see I've taped over the tripod mount, The film mask is essentially a small aluminum box with a 6x6 cm cutout. The edges of the frame are smooth enough that rollers are not necessary, but the cutout edges will be covered with smooth tape to prevent them from scratching the emulsion.
 Here's the camera back just after installation. It's hinged with tape on the one side and clasped to the body on the other with a bolt and knurled knob. Note the notch in the edge of the door to allow the bolt to seat properly. The brass washer goes on the outside of the door to prevent the knob from marring it.
 Detail of the back closing knob.
 Bottom view, back installed.
 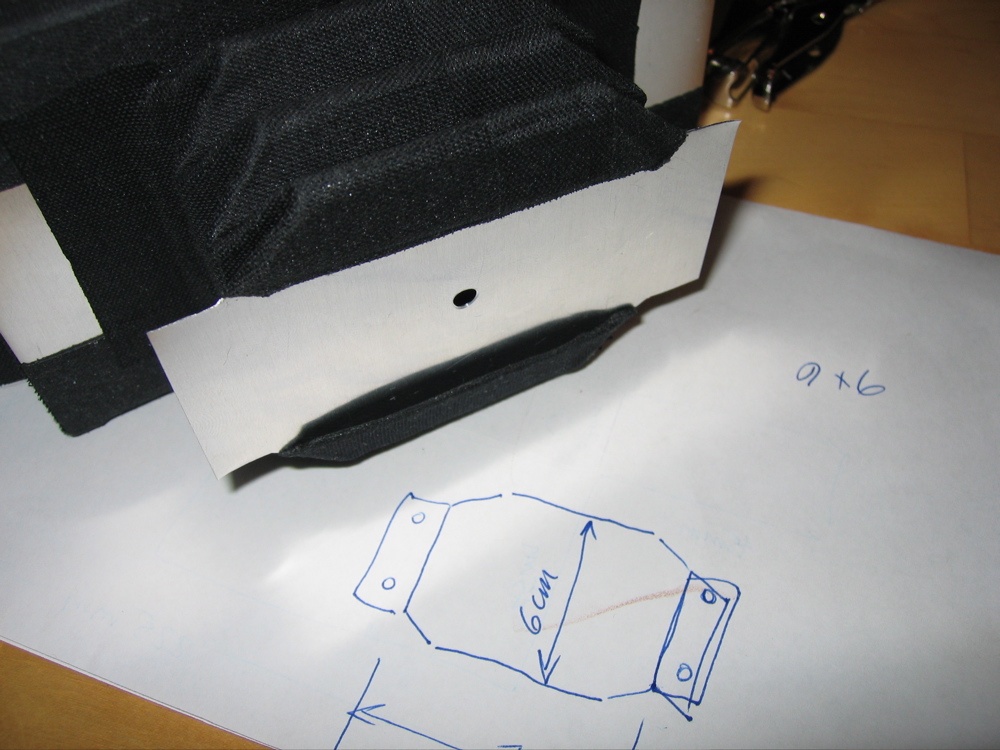 Design and dry fitting of the "lens"board into the bellows.
  Lensboard installed with side flanges bent over and drilled for four 6x32 bolts. These bolts will hold the lensboard to the stays.
 Another view
 The short stays (for 50mm) are fixed to the camera, but the long stays are not - they sit inside the short stays and are held in place solely by the bellows tension.
  The long stays (for 90mm)
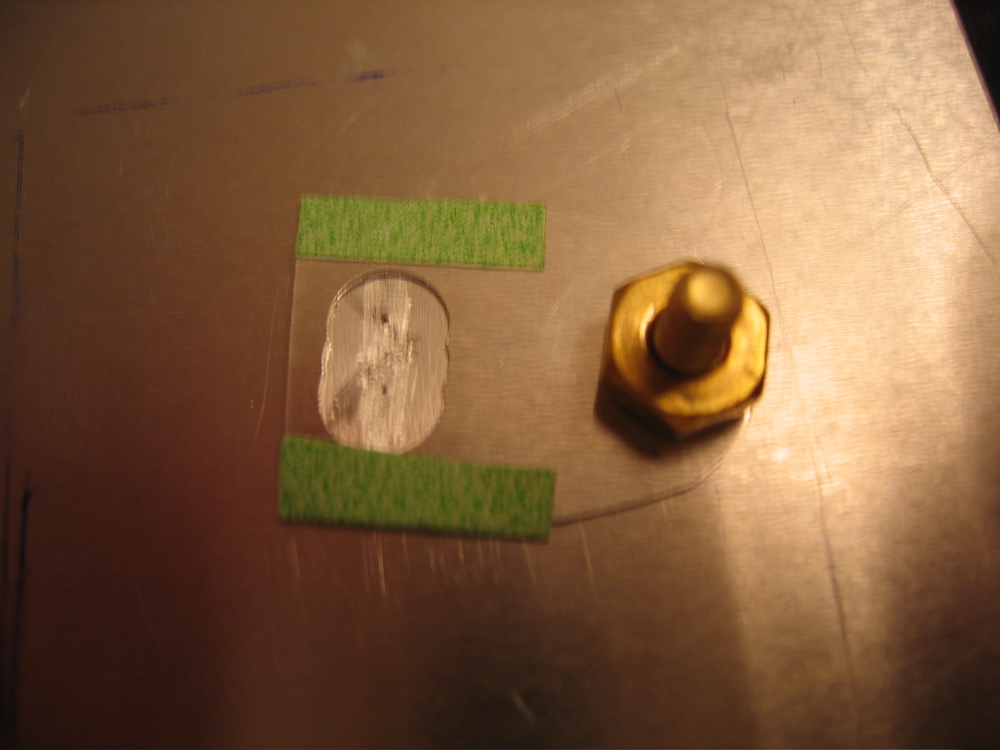 Here's a detail of the pinhole selector test-mounted on a scrap piece of aluminum to get the hole spacing right. I had to turn the flash off, so it's a little blurry. The top pinhole is 0.36mm and the bottom one is 0.27mm.
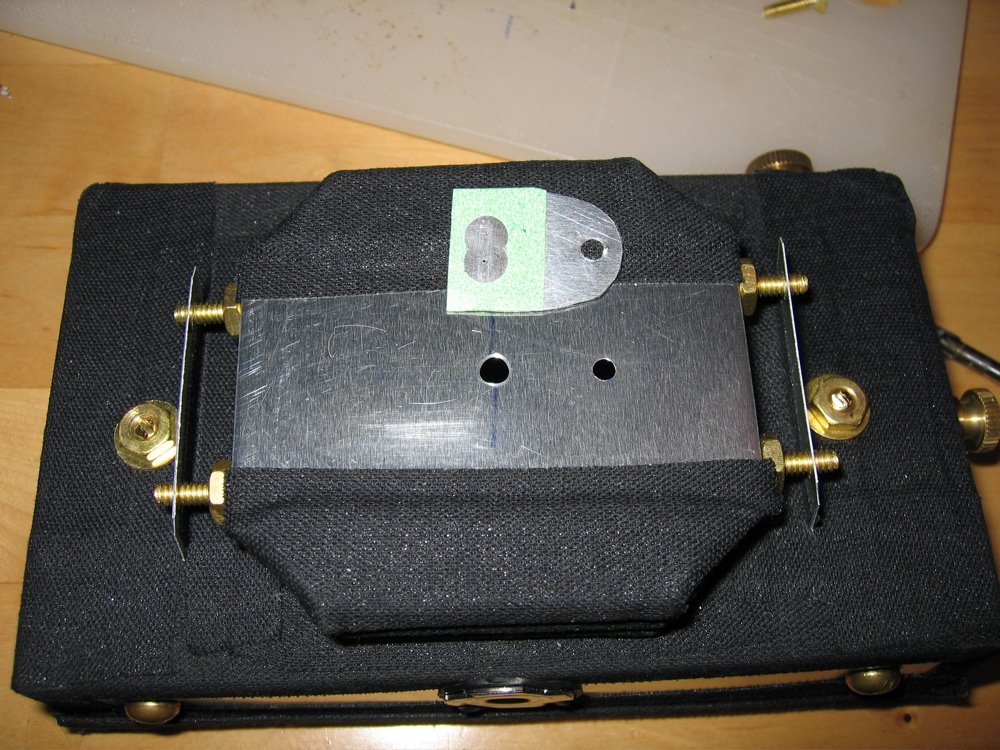 The lensboard drilled and ready for mounting.
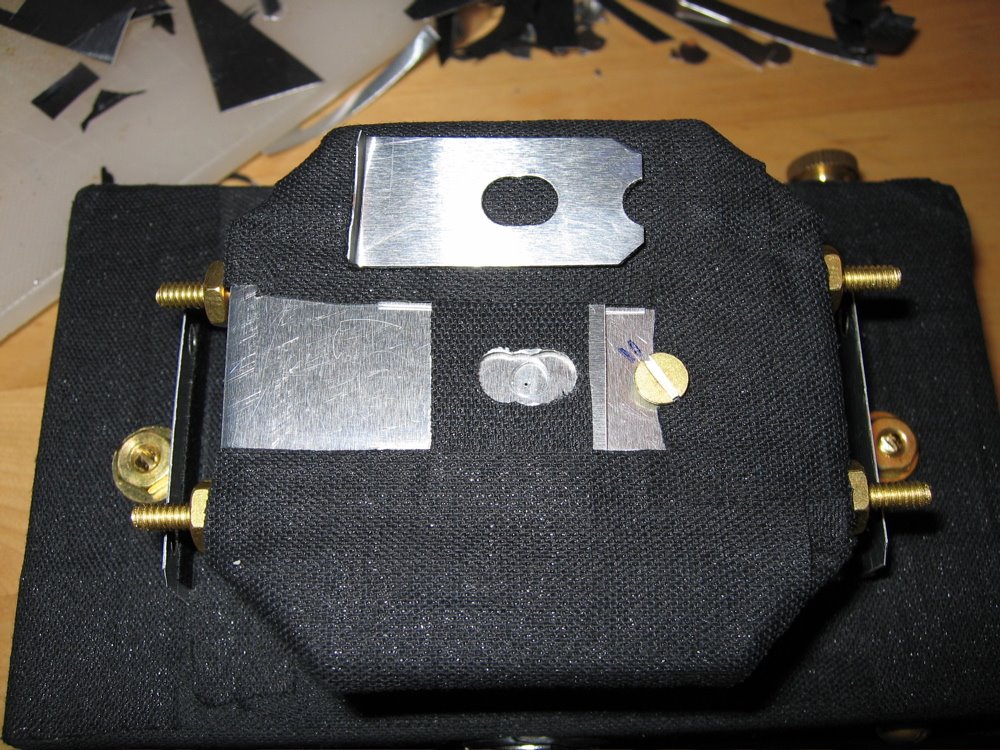 The selector installed and the shutter constructed. The notch on the shutter slider locks under the selector screw to give a consistent shutter position when pushed open with the cable release.
  The shutter and cable release installed. A rubber band pulls the shutter closed.
 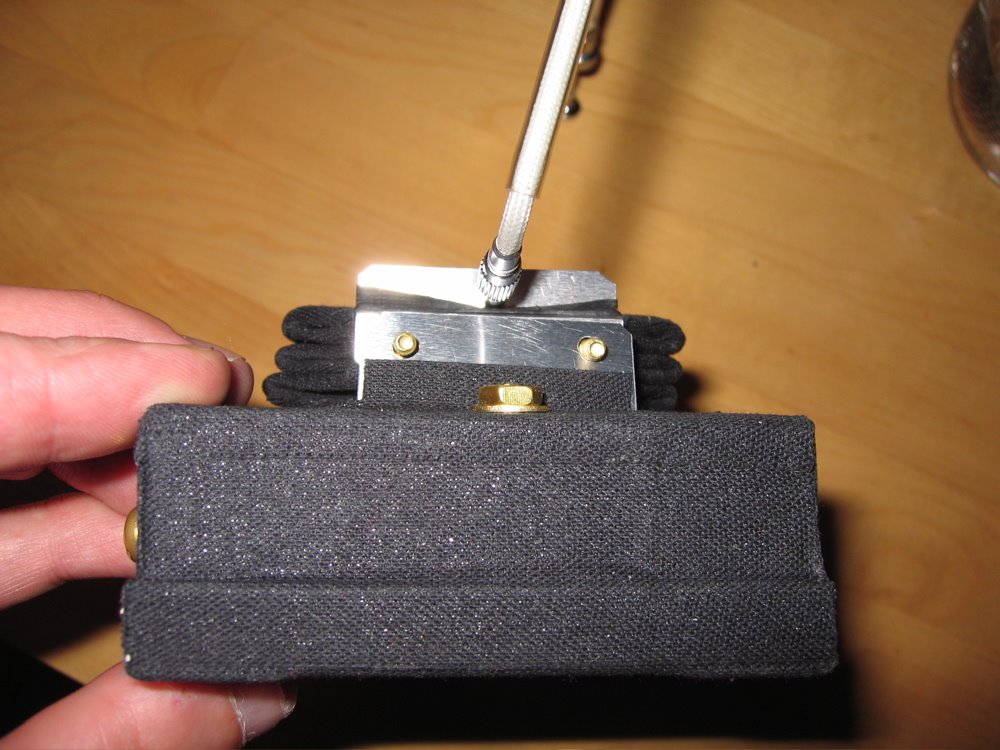 The cable release is mounted in a small flange bolted into the stay holder bolts.
  The camera ready for drilling the frame counter window.
 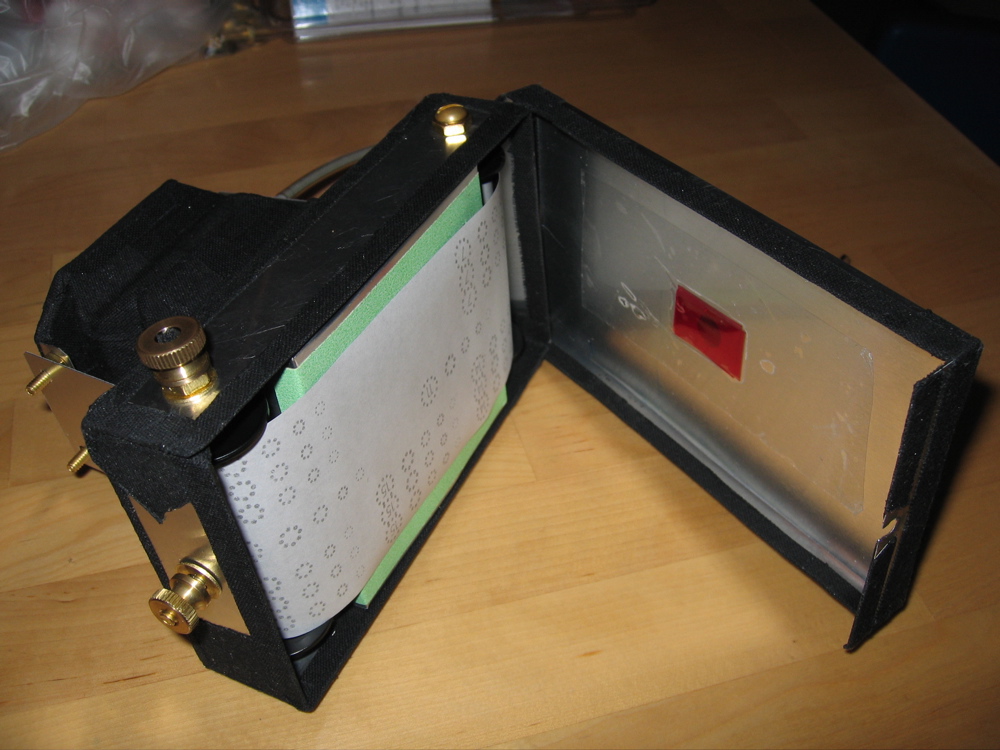 I was stumped for quite a while for a source of red acetate for the counter window. Then, one day at work I noticed a set of page dividers- the kind with the plastic tabs for inserting paper labels. The one tab was a nice ruby red. I peeled it off the paper, cut it into four pieces, cleaned off the paper and residual glue with 95% ethanol, and taped the stack of four into the camera over the counter hole. The four layers makes it nice and dark, but clear enough to see the film numbers.
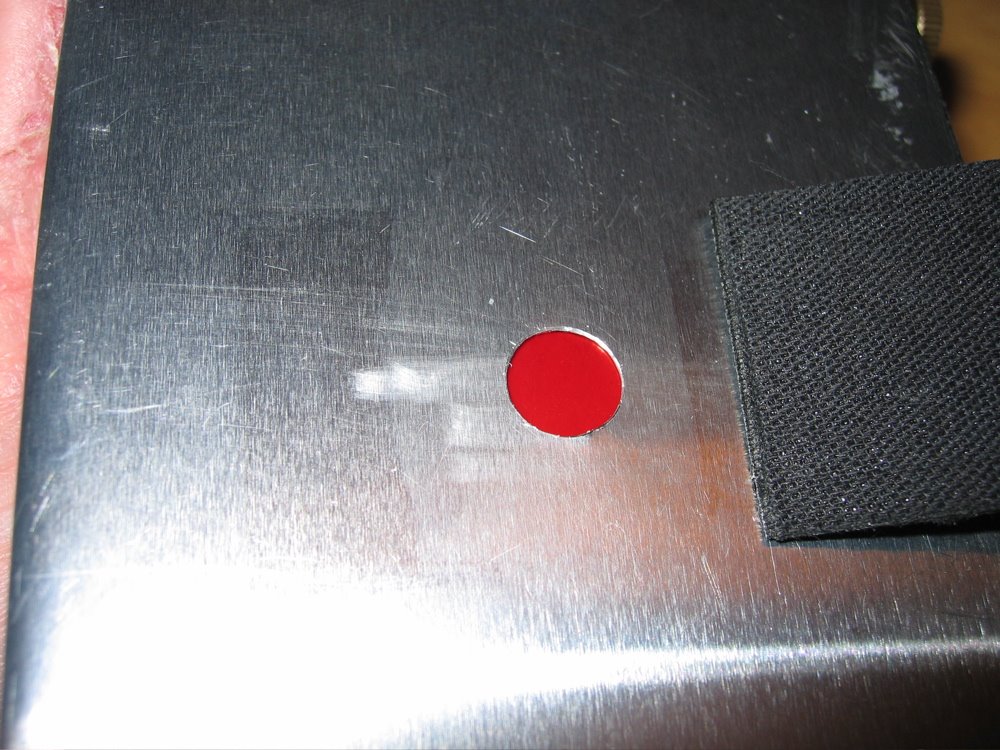 I made a cover for the counter window to shade it when not in use.
 The finished camera, ready to go! I should be able to get 120 film in a few days (120 isn't available in my hometown, so a trip into the city is in order). If you want to try a similar build and need more details, leave a comment or send me a message through f295 (I'm member "gabriel531").
2 comments:
very nice piece of work!
the most interresting folding pinhole camera i will make for my travels in India, thanks.
Post a Comment